

Welcome to this edition of Maximum Heresy! Now here is my objective. The Necron Lord kit is actually just a normal Destroyer kit with extra metal bitz thrown in. Now if your a disciple of the cult of magnets you can commit a bit of bitz depravity to squeeze two models out of one.
-In the picture below I have started prepping and preparing it for magnetization.

-Now some don't know this the destroyer lord is just a normal lord with some metal bitz thrown in.

-Using a 1/8" drill bit in Ol' Drilly I made holes in each arm sockets and base of chest after deburring the metal pieces. A method I use to keep from drilling too far into the model is to take a black marker and black out the drill bit after 1/16". This makes a good reference point.
**PPE Alert: Use a leather glove and ze goggles as the metal warms up very quickly and sometimes flies (Guided by Chaos) into your eyes.**


-After clearing the hole I'm ready to insert my 1/8 x 1/16 magnets using modeling epoxy.

-Its always good to have a reference point when using magnets. I have done a few models previously so I can use one of my previous limbs as a way to keep track of the polarity. Keeping the polarity directions the same as other models limbs allows you to play mix and match with various parts.
-The magnets are glued into the holes made in the base of the torso and arms. Paperclips are great to lay across the holes to keep the magnets from falling or shifting especially if you drilled to deeply.


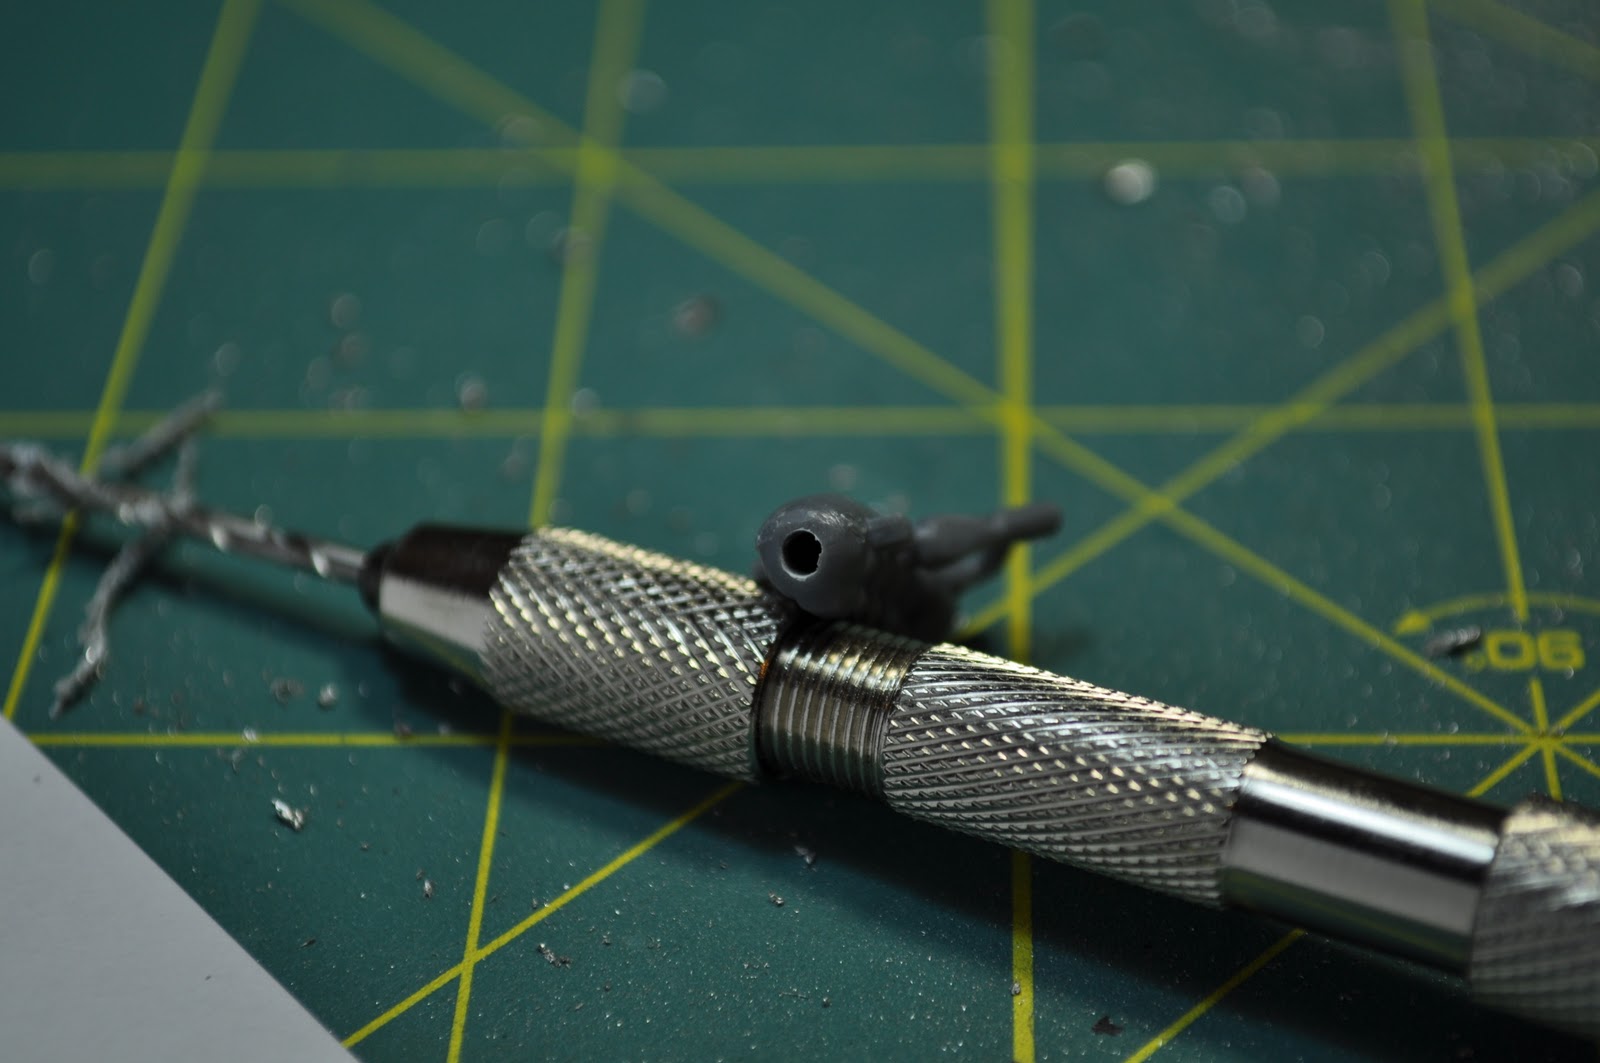
-Plastic parts are harder to retrofit with magnets because they leave no room for error. Especially plastic parts with rounded edges so you want to use a smaller drill bit to make a pilot hole to guide the larger drill bit when drilling. Here I took my pin vise with a smaller drill and made said pilot in the spine of the model. This will allow us to swap between the Lord body and Destroyer body.

-Here is a better view of the pilot hole that was drilled using the hand held pin vise.
-Here I came through with the larger 1/8" bit and then filed the edges on top that were rough. On small plastics you will want to make the 1/8" hole by hand. Using a dremel on a small plastic piece is a problem waiting to happen.

-Since I got over zealous drilling with a dremel (Practice what you preach right?) I had to use a paperclip to hold the magnet level with the top while the glue set.

Here is a pic of my other Lord with the magnet mod. The cool part is When you have multiple models based on magnets you can interchange the arms and articulate them in various poses on display boards. In part two I will show you how I prepped the necron limbs for magnets and if they look to gaudy when gessoed and painted.

-M4X
Published with Blogger-droid v1.6.5

No comments:
Post a Comment