

Hey everybody, Chaosheade here with another tutorial. Our subject this time is Mycetic Spore pods, the Tyranid version of drop pods. This is just one of the many units in the codex that does not have an official model, making it a prime candidate for substitution, conversion, etc. There are a number of tutorials out there most often using foam balls or eggs but most of them were either too much work or just didn't look good to me. There are also some models made by other companies such as Plasma Hatcher toys (~$20 or more depending on availability) or the models from Chapterhouse Studios ($35) and Mr. Dandy ($42-48) but these options are quite expensive. I finally found one that really caught my attention in this thread on The Tyranid Hive forums. This method is much more economical than purchasing one of the 3rd party models and in my opinion looks better and is easier to make than any of the other methods I researched. I can't take credit for the original idea but what I have done is create a formal step-by-step tutorial that more fully explains the process of making these spore pods. More after the jump.
The materials:
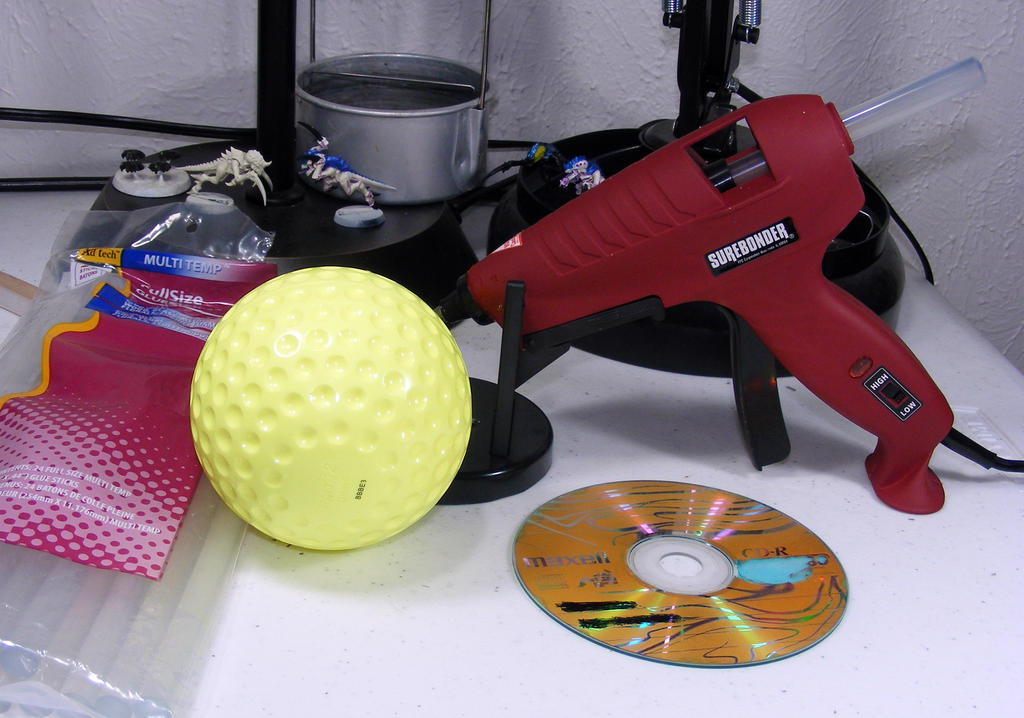
- A base for your model such as an old CD that you don't want or need any more.
- An "outdoor play ball." You may have some laying around but I found them at the local sports store (in the baseball/softball aisle) and picked up half a dozen of them for around $25, less than the cost of just one of the comercially available spores. The ones I picked up have logos imprinted on the top and bottom but those will be easy to cover up.
- Hot glue gun and glue. Mine is dual temperature and I used the "high" heat setting for this project. I bought the hot glue gun about a year ago mainly for terrain projects and it cost about $20-25, but you can get a basic one for as little as $5. Glue sticks are also inexpensive, just make sure you match the right temperature glue with the temperature of your glue gun. If you get a high heat gun, get high heat glue. Multi-temp glue is a little more expensive but can be used in any glue gun. Also compare the prices on the long and short sticks. I found that the longer sticks are more economical and don't need to be refilled as often but the shorter sticks are easier to manage, especially if you have a smaller glue gun.
Total Cost: Just a little over $25 for 6 spore pods counting the cost of the glue sticks used. If you do not already have a hot glue gun and glue, add ~$10 to the cost for a basic setup or more for a nicer one that you can use for a variety of projects.
 |
| I used a CD that got a bit scratched up, left out in the rain, and was just generally ruined. Like I said, it doesn't have to be pretty and it's going to be painted over anyway. |
The Method in a Nutshell:
- Glue ball to base
- Make glue tendrils
- Paint
Simple as that. Well, not quite. It takes a bit of finesse awesomeness practice to perfect the technique but even if you screw it up (like I did the first time) it still doesn't look bad. We are creating an alien ball of biomass that plummets to the ground from orbit, smashes open to spew out its payload and flails around a little bit with its tentacles before it dies. In other words, it doesn't need to be pretty. trooperpx the author of the forum thread where I got the idea shares his method in post #7 of his thread.
Gravity will do a lot of the work for you and the more you let gravity help the more realistic looking your goo tendrils will be. It took me a little while to get the hang of the steady trigger pressure and glue flow but it's easily done with a little practice. He also recommends practicing on something like an empty coke can before starting on the spore pods but I decidedI was too good for that to learn by doing and jumped right in. I think I used too much glue on the first one but the second one ended up looking pretty good. You will see the difference at the end of the tutorial.
I did have some trouble deciphering exactly what he meant in some parts of his explanation but I was able to figure it out and the method is not super complicated. I'm also somewhat familiar with hot glue already so I was able to figure it out pretty quick. Now I will show the WIP pictures of the creation of my second spore pod. As you will see in the pictures the balls have a number of "rings" of dimples going around it horizontally. I started with the lowest ring and just worked my way up one ring at a time using the high heat setting on the hot glue gun.
Attaching the ball to the base: I just laid down a ring of glue around the center hole of the CD and put the ball on it. Nothing complicated but be careful because the CD can warp slightly during this step. It happened to this pod and as you can see it's not a huge amount. It's hardly even noticeable and will not have any real impact on playability, but you should be aware that it can happen.
Lowest rings: Unless your glue gun has an abnormally long nozzle it can be tricky to squeeze in between the ball and the CD to hit those dimples. The way I did it was hold the pod horizontal (rotate the pic 90 degrees or tilt your head sideways if you need help visualizing) and let a drop fall into the indentations, then turn the pod right side up so gravity can pull the glue down to the base. I didn't worry about making a solid line of glue from the ball to the base on every one. It will most likely be covered up by further layers and personally I think it looks good with some drips hanging in mid air at different levels not touching the ground. You can apply the glue to one dimple at a time but I went for 3-4 at once to speed things up and it worked fine.
"In the first pic, I use some blobs of hot glue to keep it in place at the angle I want. I use hi-temp hotmelt glue in a variable hi/low gun. On hi temp the glue will flow and spread out a little. On low it will keep it's shape better. Use the tip of the gun like a pen, and "draw" the glue on. Practice will help you keep pressure on the trigger for an even line.
So then I begin following the dimples in concentric rings from the inner out, second pic. I've been sculpting with hot glue for a long time, so it may take you awhile to get the hang of it. You need to be able to "feel" how hot the glue is by the preassure/resistance on the trigger. On hi, put a bloop in one of the dimples, then "draw" a line out down to the base. Let gravity do the work making a drip. For the lower hemisphere I just went straight down. Following a previous line will allow the other to cling and support it a little, allowing it to be a little thicker.
For the upper hemisphere I follow the longitude of the ball... like the tendrills off a jellyfish. Following most of the lines will allow more of the ball to show through and build up the mass/diameter. Then on the last ring of dimples, I might go inbetween previous lines to draw attention to that last added detail."
Gravity will do a lot of the work for you and the more you let gravity help the more realistic looking your goo tendrils will be. It took me a little while to get the hang of the steady trigger pressure and glue flow but it's easily done with a little practice. He also recommends practicing on something like an empty coke can before starting on the spore pods but I decided
I did have some trouble deciphering exactly what he meant in some parts of his explanation but I was able to figure it out and the method is not super complicated. I'm also somewhat familiar with hot glue already so I was able to figure it out pretty quick. Now I will show the WIP pictures of the creation of my second spore pod. As you will see in the pictures the balls have a number of "rings" of dimples going around it horizontally. I started with the lowest ring and just worked my way up one ring at a time using the high heat setting on the hot glue gun.
 |
| If you look reeeealy close you can see a little gap where the CD warped. |
Attaching the ball to the base: I just laid down a ring of glue around the center hole of the CD and put the ball on it. Nothing complicated but be careful because the CD can warp slightly during this step. It happened to this pod and as you can see it's not a huge amount. It's hardly even noticeable and will not have any real impact on playability, but you should be aware that it can happen.
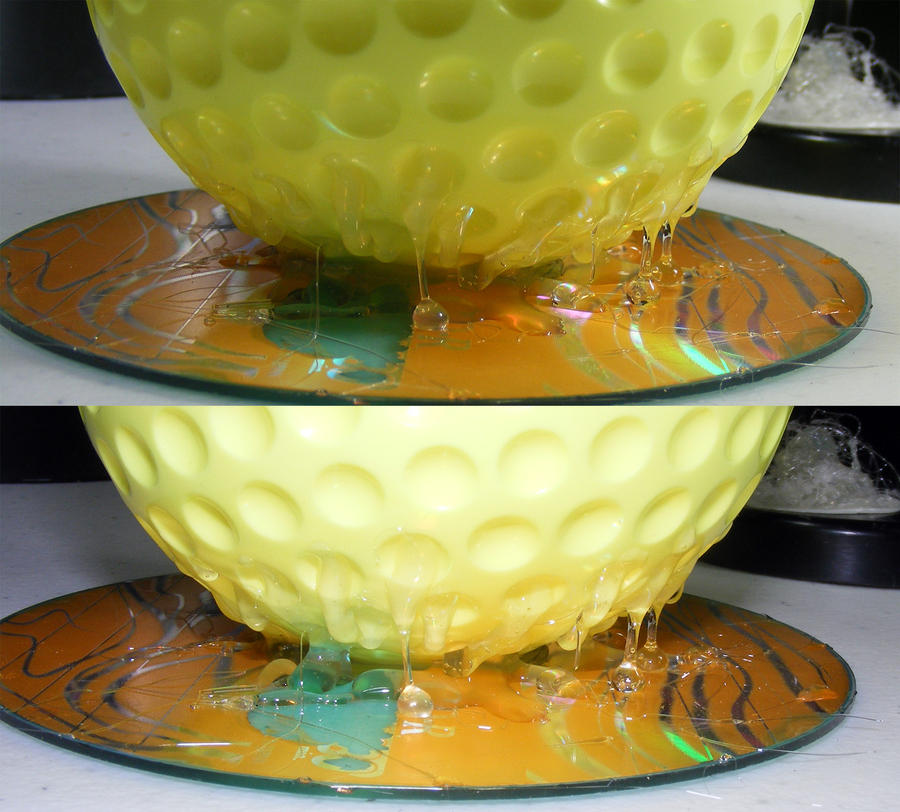 |
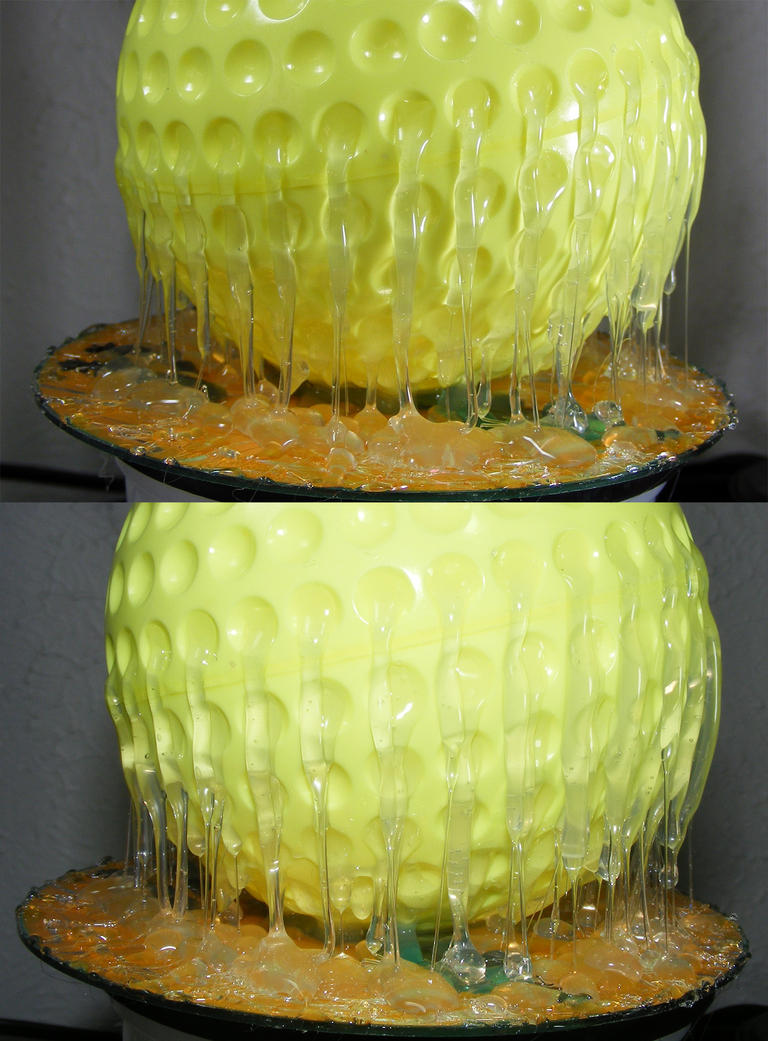
| You can see different parts of the glue with and without the camera flash so I have them both together to let you get a better idea of how the whole thing looks. |
 |
| My camera has a mode where it takes 2 pictures in rapid succession. One without flash and one with flash so you basically get 2 versions of the same picture. A lot of the time I end up discarding half of the pictures from that mode but it turned out to be very handy for this project. |
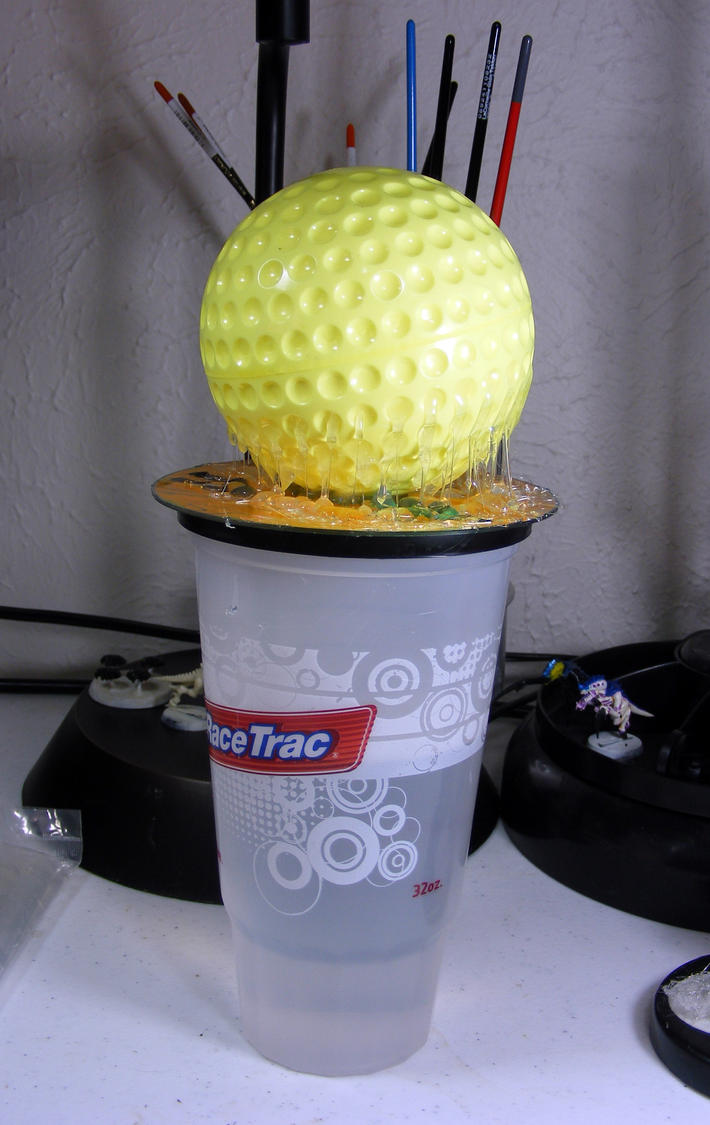 |
| Check out my super expensive extra fancy high tech elevation enhancer with H2O ballast. I can taste your jealousy from here. |
Around mid way you can cheat: Once I got to the point where I did not need to tilt the pod to get at the dimples I used my high tech elevation enhancer to raise it up to a level that was easier to work at and easier on my back. YMMV but I found it very helpful.
 |
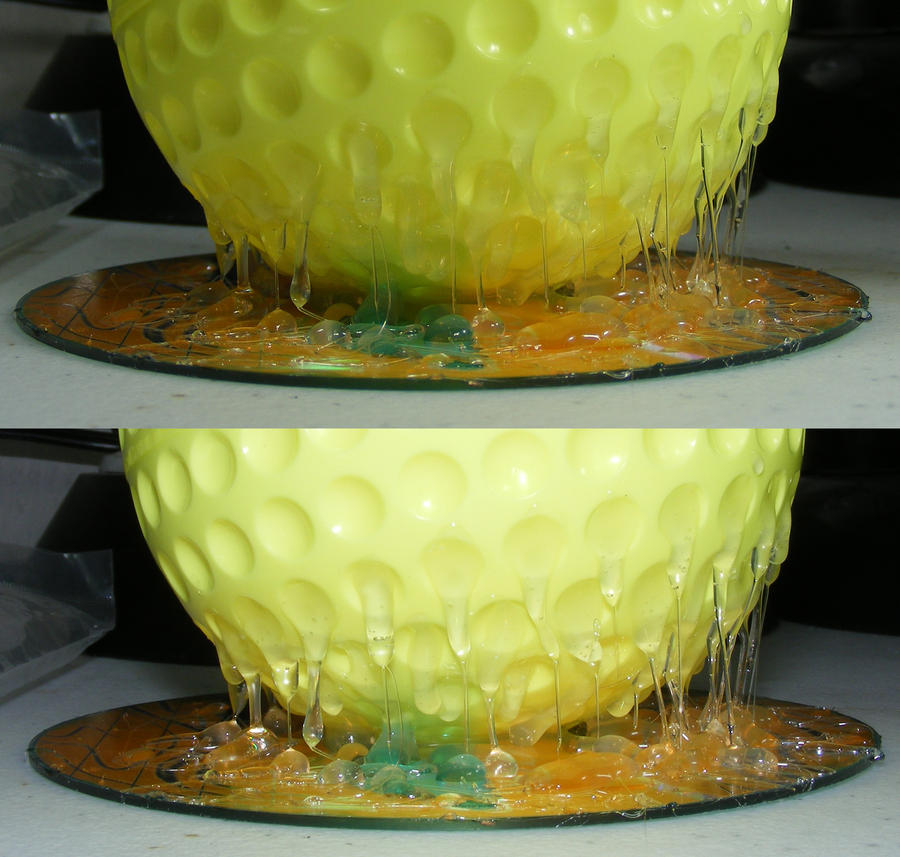
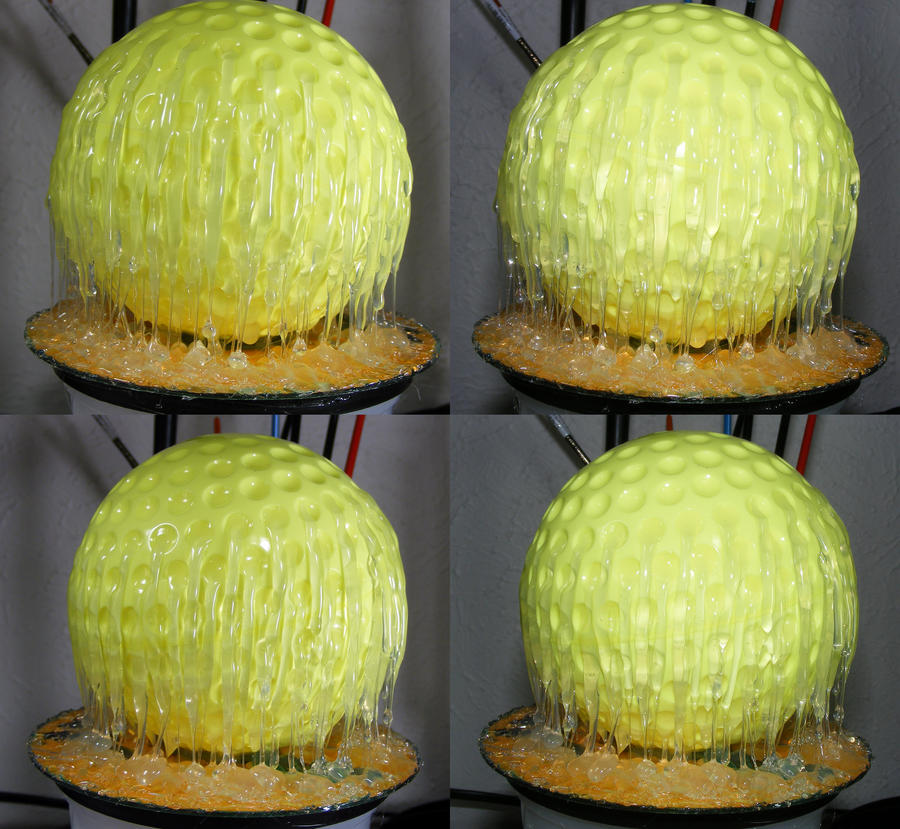
| Check out those layers. It's really starting to come to life. |
The upper levels: At this point the dynamics of your tentacles will change (see how smart I am with my big boy words?). They will tend to be thicker as they flow down the side of the pod because they have something to cling to and attempt to defy the gravity that strung out their lower brethren and pulled them apart. This is where trigger control starts being more important to get a nice even flow. Keep letting gravity do most of the work and be careful not to glob too much glue on the side of the pod. This is when you really start to see the layering effect, especially if you left the globs hanging off at different levels.
 |
| It's aliiiiiiive! *maniacal laughter* |
Getting to the top: Same as the upper levels but with more surface area to cover before the drop to the base. Keep your trigger finger steady and just keep going at it. By this point you should have a good idea of what you are doing. Just keep at it, you're almost done!
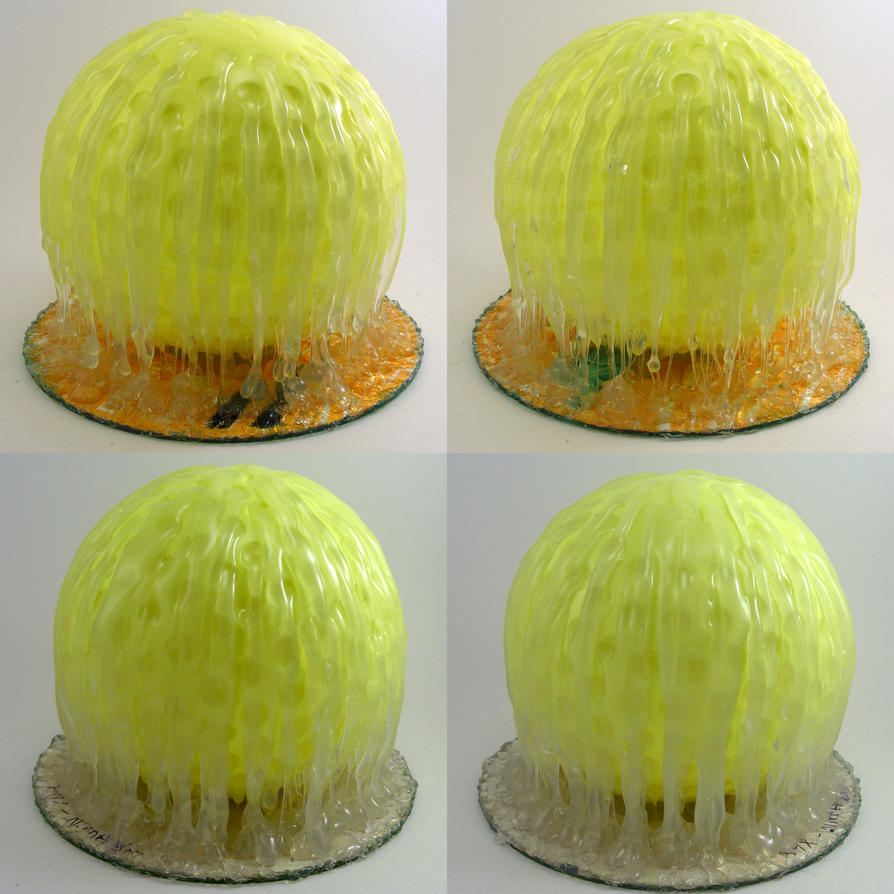 |
| Gross. I like it! |
And I'm spent: Finally finished with all the hot glue, now it's into the light tent for some glamour shots. Here you can see a side by side (or top by bottom I guess) comparison between the first and second pods with the bottom one being the first. There is quite a bit of difference between the two. The second pod used up less glue and looked better doing it. The first one is also more tilted at more of an angle than the second one but it's not a large difference. I do still need to cover up that logo on the second pod but that will be easy. So there you have it. Now it's time to fire up the airbrush and get some paint on this baby... tomorrow maybe.
So now you know a cheap, easy, fast, and effective Mycetic Spore Pod conversion. Once you get the hang of it you can easily pump these babies out in 30-60 minutes and they shouldn't take too long to paint. My current plan is to prime and base coat with my airbrush (spray paint will work too) and then add some purple wash to the tentacles to match the fleshy bits on the rest of my army. If the wash doesn't do the trick I'll probably use some purple paint but I imagine the tendrils being more gooey than fleshy so I'll see how the wash does first. That's all for today so stay tuned for the next part and I'll catch you on the flip side.

No comments:
Post a Comment