
 |
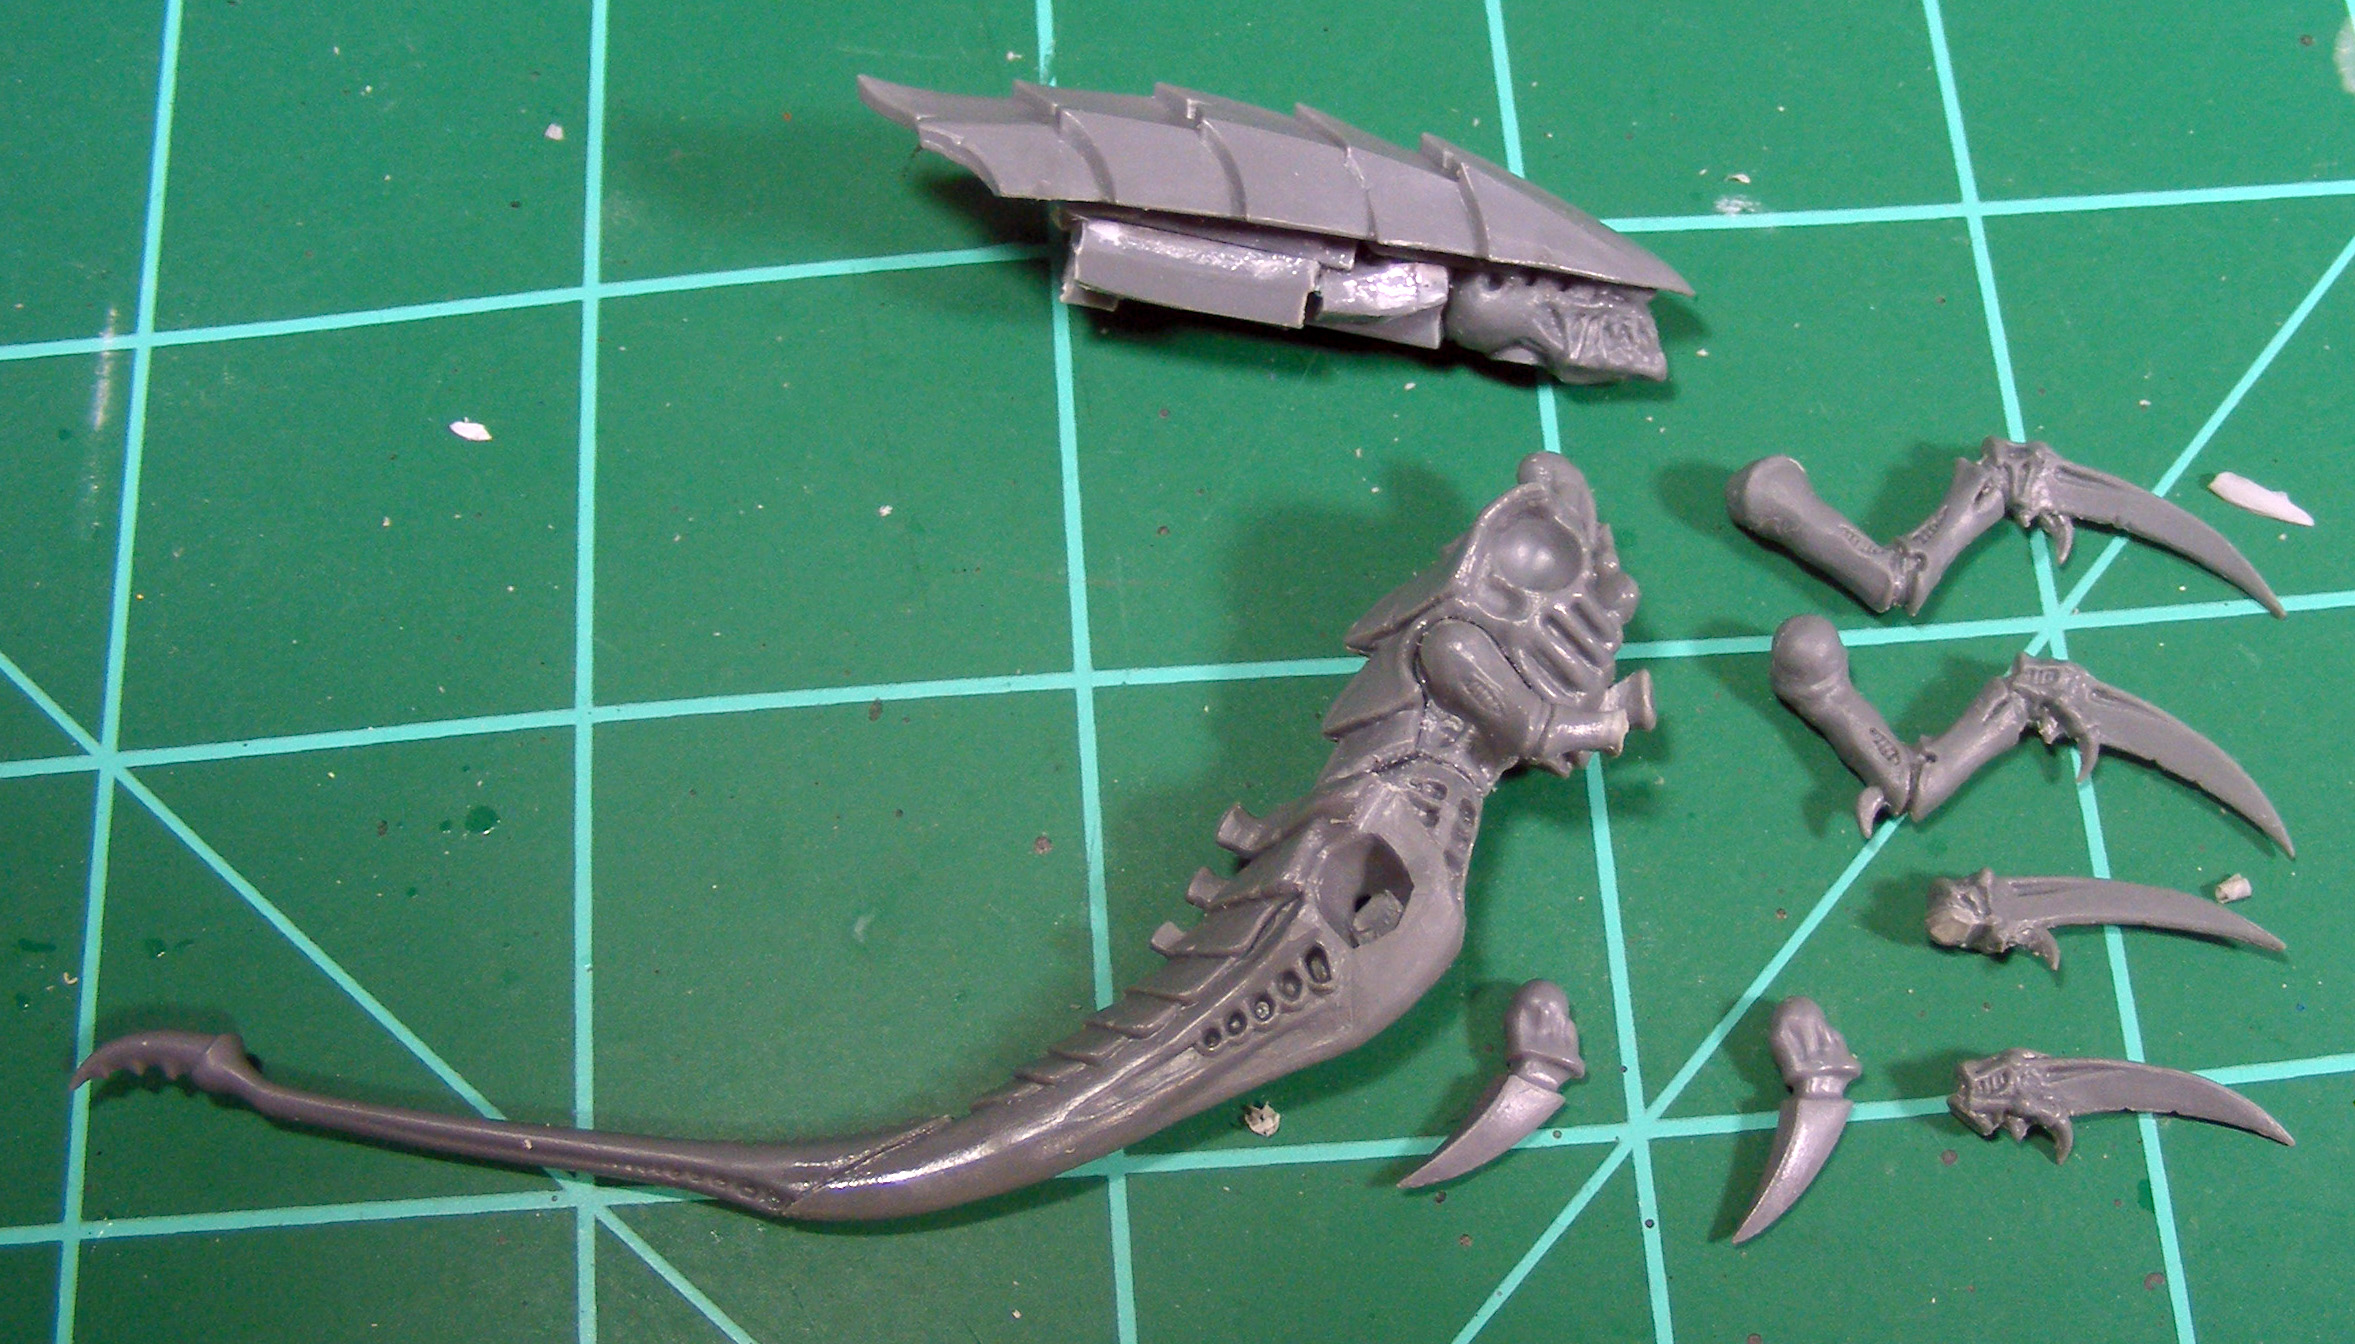
| WIP picture of the new and improved Zoanthrope conversion. |
I started with most of the same pieces as the first conversion with a few substitutions. I have the head crest, face, and basic shape of the head done, and the torso and lower body sections were cut up, shaved down, and glued together. On the first Zoanthrope I used a heat gun to bend the tail and mawloc tongue into shape and then cut and attached them together. This time around I cut them up and used plastic glue to bond them together before taking the heat gun to it. I am hoping that it will help me shape the tail section more easily and get it into a better position so this model will stand more upright than the first one.
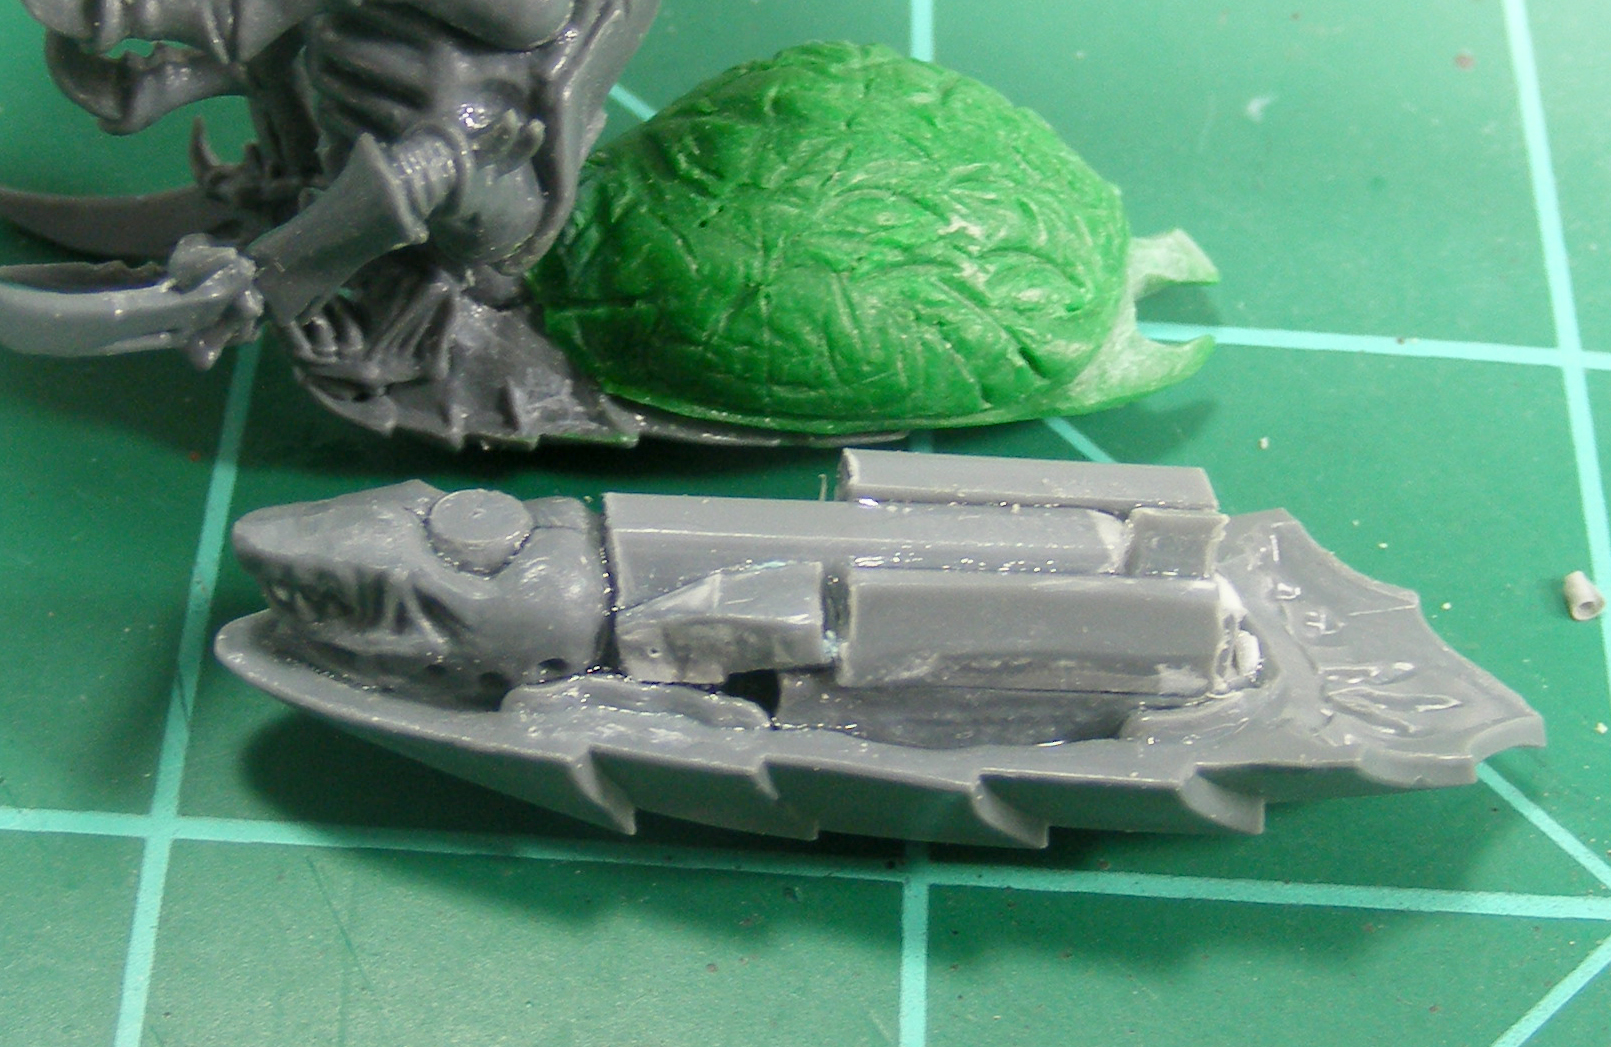 |
| Here's how to make a cheapskate's conversion even cheaper! |
For the head section instead of the warrior head and face I chose to go with a hormagaunt head with the trygon head crest. The warrior face by itself is really small and the angles are thrown off when trying to attach it to the trygon crest. I also considered using a termagant head but decided to go with the hormagaunt head because it was a bit larger and the angles of the eyes, mouth, and chin worked better. I shaved off the top part of the hormagaunt head and glued it in place at the front of the crest. Once that was in place, I filled in all the empty space in the hollow crest and some additional space behind the head. This will help fill all that empty space so I don't have to use as much green stuff to sculpt the rest of the head and the brain which just adds to the savings. The new head is significantly larger than the previous one, is much closer to the official model, and just looks a lot better.
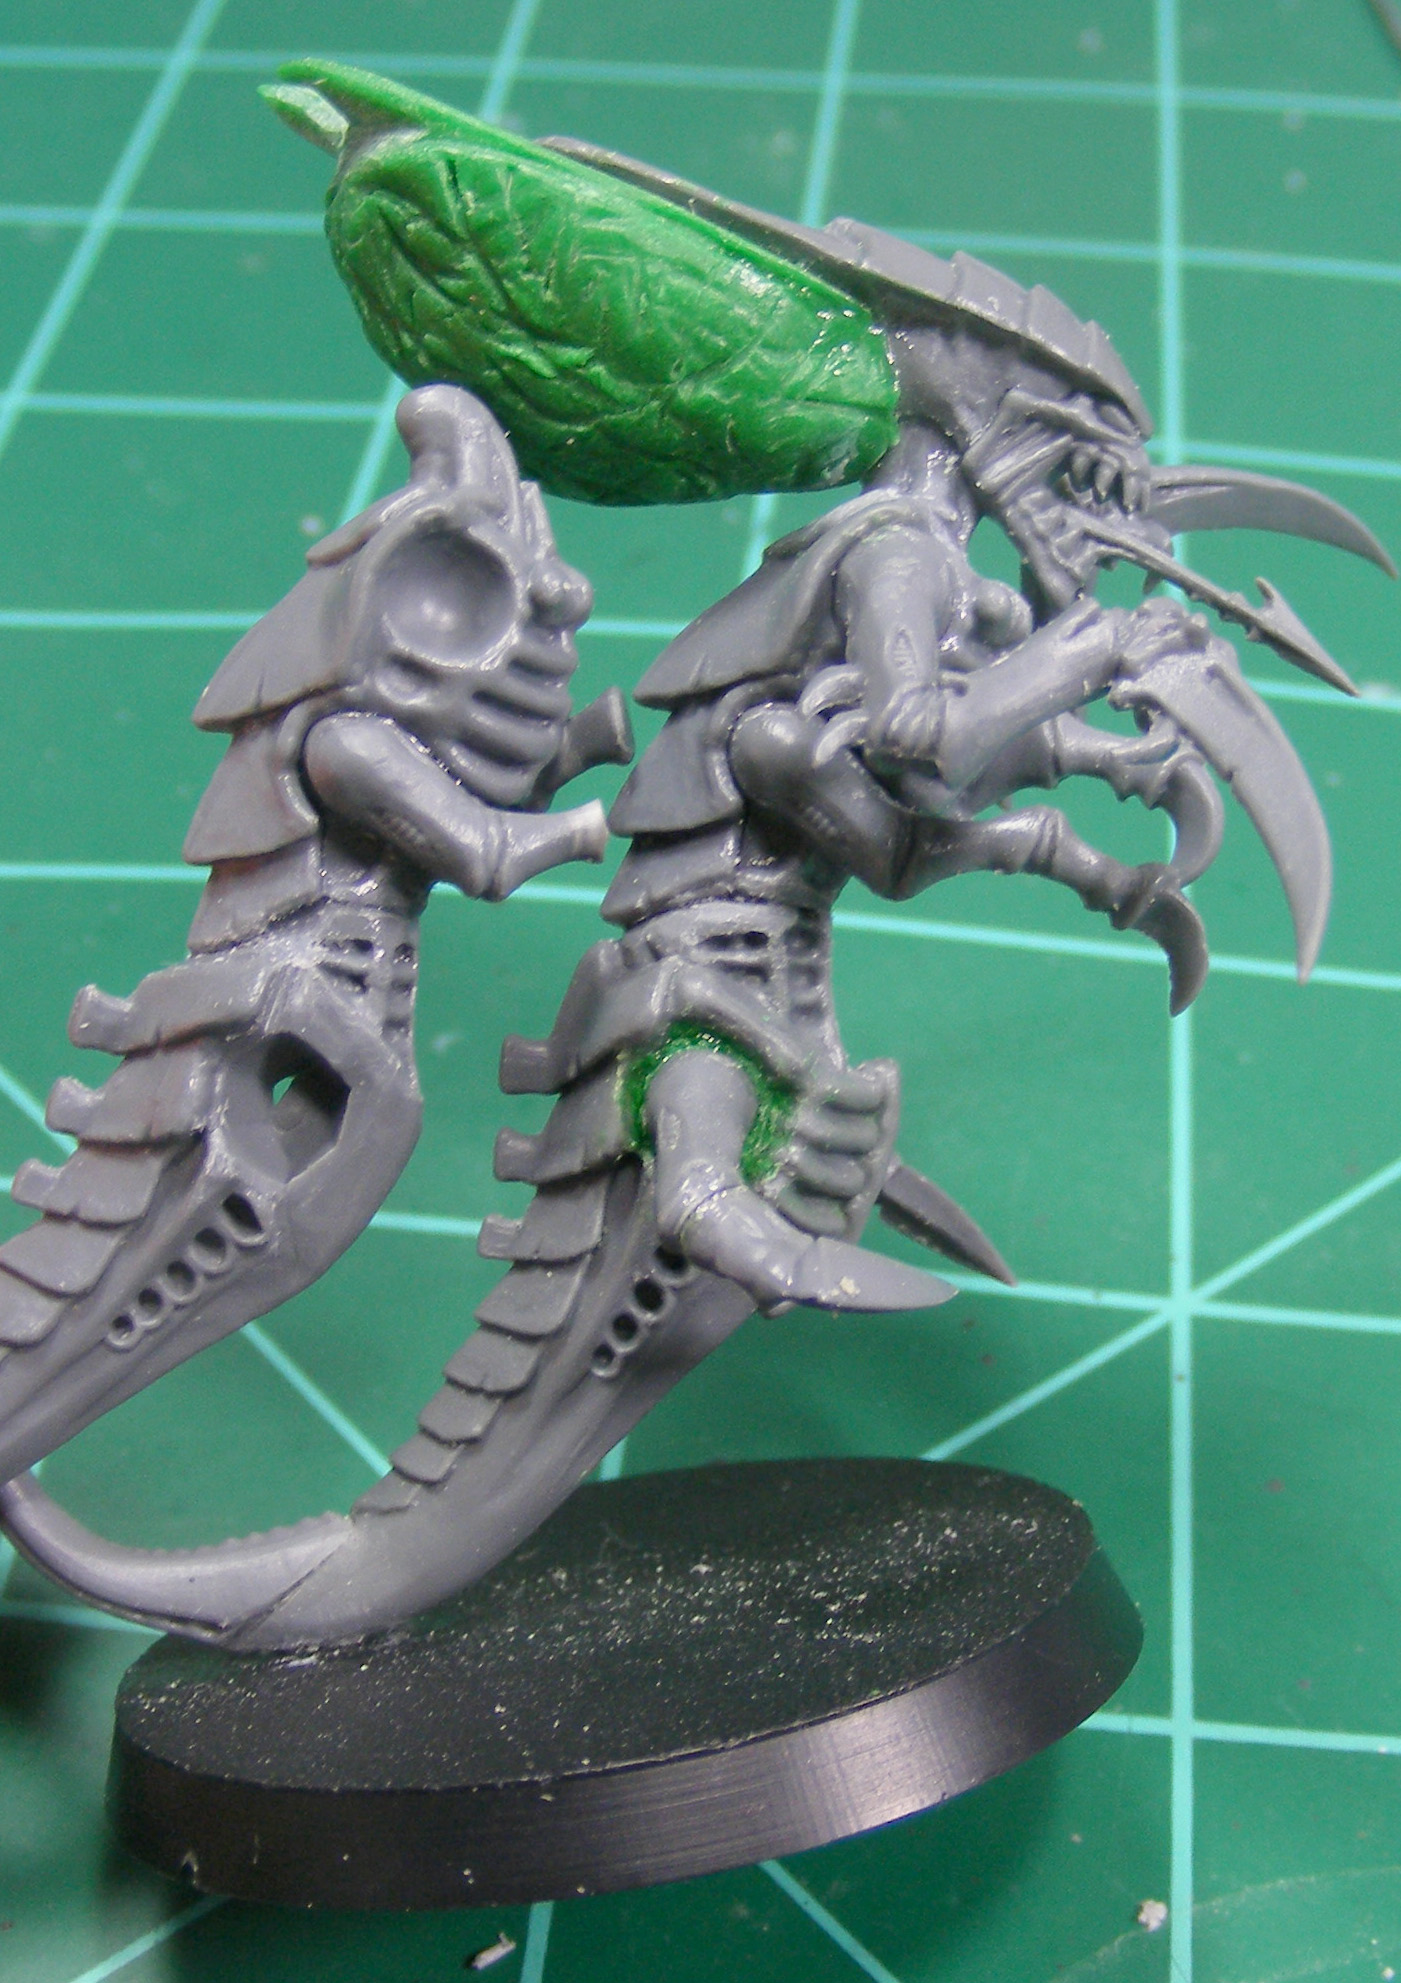 |
| The left Zoanthrope got liposuction... except it was more like lipo-cutting. I wouldn't recommend it. |
The other major change you can see is how I decreased the size of the hips on the warrior tail section. The hips on the first conversion were way out of proportion with the rest of the body and made the model look awkward. I cut off quite a bit of material and then smoothed down the front of the hips. I think I went a little overboard when cutting out part of the section that attaches the tail to the torso while trying to make it lean back more.
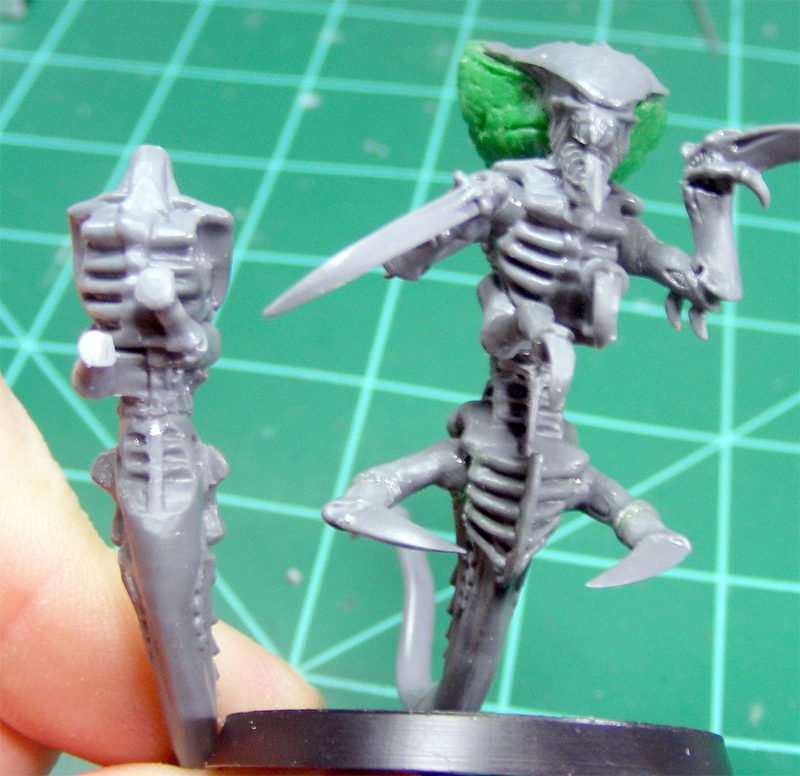 |
| Yeah, it's a bit blurry. That's what I get for holding the models with one hand and the camera with the other. |
The amount of difference the hip reduction made is really highlighted when viewing the models from the front. This is the angle that was most out of proportion due to the large hips. The second version is much closer to the official model and looks much less awkward. Below is a picture showing different viewing angles of the official model for comparison since GW apparently only wants to show one angle on their website. You can really see the difference that the smaller hips make and how much of an improvement they are over the regular warrior hips.
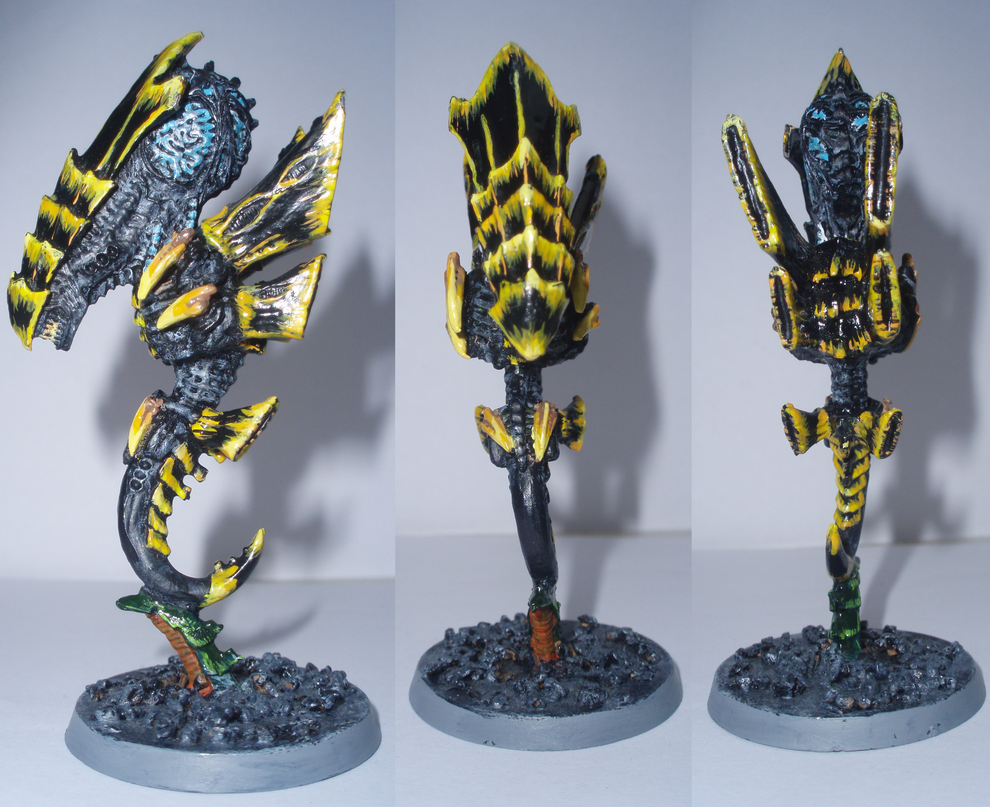 |
| Side, front, and rear views of the official Zoanthrope model because GW apparently doesn't want us to see these angles. by Jason-Alex-Young |
And that's what I have so far. Next step will be whipping out my head gun and bending the tail into position and green stuffing the rest of the head and the brain, then putting it all together including the arms. I should have the second model done in the next couple days so stay tuned for more updates. Any comments, feedback, or anything else you want to say is always welcome. Until next time, this is Chaosheade signing out. Catch you on the flip side.

No comments:
Post a Comment